


Playwright is a great tool for automating your end-to-end tests. If testing cycles are shorter and well executed, engineers get to deploy to production more often. This makes both QA and engineering teams more confident in every release!
In this guide, I’ll share my experience and guide you through getting started with Playwright and automating your first script.
Why Should You Use Playwright?
I spent some time working on a detailed comparison of the most often used solutions for automated testing. Here are the three Playwright features that were the most appealing to me.
- Cross-browser support: Playwright supports all modern browser engines, including Chromium, Firefox, and WebKit, all through a single API. Setting up test processes for multiple browser environments is a breeze.
- Developer-friendly API and debugging tools: Playwright offers an intuitive API that mirrors real user interactions, making tests easier to write and understand. The built-in debugging tools, including trace viewer and inspector, help you quickly identify why tests fail – saving hours of troubleshooting compared to older tools like Selenium.
- Full test isolation: Each test runs in a unique browser context, which is equivalent to a fresh browser profile. This approach ensures complete test isolation. No state from any test can affect another test execution, and all with no additional overhead.
Prerequisites
For this tutorial you’ll need to install the latest version of Node.js and npm (that comes out-of-the-box when you install Node.js).
Getting Started With Playwright
Playwright offers different options for installation. For this tutorial, we’ll use the most straightforward option – npm.
Let’s create and navigate to a new project directory using the following command:
mkdir playwright-project && cd playwright-project
Note: playwright-project is the name of your project directory. You can replace that with your preferred project name.
Next, navigate to the new project directory and enter the command below to initialize a Playwright Test project.
npm init playwright@latest
When you run this command, Playwright will prompt the following questions to help you configure your project. I’ve provided some recommended answers to get you set up quickly:
- Do you want to use TypeScript or JavaScript?
TypeScript - Where to put your end-to-end tests?
tests - Add a GitHub actions workflow?
no. However, if you intend to host your code on GitHub, feel free to choose yes. - Install Playwright browsers?
true
You should now get an output that looks like this:
Initializing NPM project (npm init -y)...

Wrote to /playwright-project/package.json:
{

	"name": "<your_project_name>",
	"version": "1.0.0",
	"main": "index.js",
	"scripts": {
	"test": "echo \\"Error: no test specified\\" && exit 1"
},
	"keywords": [],
	"author": "",
	"license": "ISC",
	"description": ""
}

# ...

And check out the following files:
- .\\tests\\example.spec.ts - Example end-to-end test
- .\\tests-examples\\demo-todo-app.spec.ts - Demo Todo App end-to-end tests
- .\\playwright.config.ts - Playwright Test configuration
Note: This output has been truncated for brevity.
The output indicates that the command initialized an npm project in a package.json file, installed the playwright package, and added the following key files to your project directory:
playwright.config.ts: The test configuration where you can define test rules, including modifying browser environments.tests: This folder contains a basic test script to help you get started. As you’ll see later on, Playwright recursively queries this folder for tests.tests-examples: This contains a demo todo-app test script you can try out.
Run the Example Test
To run the example test script, enter the command below in your terminal.
npx playwright test
This will run all the tests in the tests folder you defined earlier when configuring your Playwright project.
Your output should look like this:
Running 6 tests using 6 workers
6 passed (4.1s)

To open last HTML report run:

npx playwright show-report
This indicates that six tests, run using six workers, passed.
By default, Playwright runs tests in parallel, according to the number of available CPU cores. Tests are also run on all three browsers. You can modify these options in the playwright.config file. We’ll show you how in a later section.
In your output, you’ll also notice that the last line offers a way to open the HTML report. Let’s see what that looks like.
npx playwright show-report
When you run this command, you’ll receive the following response.
Serving HTML report at <http://localhost:9323>. Press Ctrl+C to quit.
It indicates that Playwright serves the report locally. At this point, your default browser window will open, displaying the report, like in the image below:
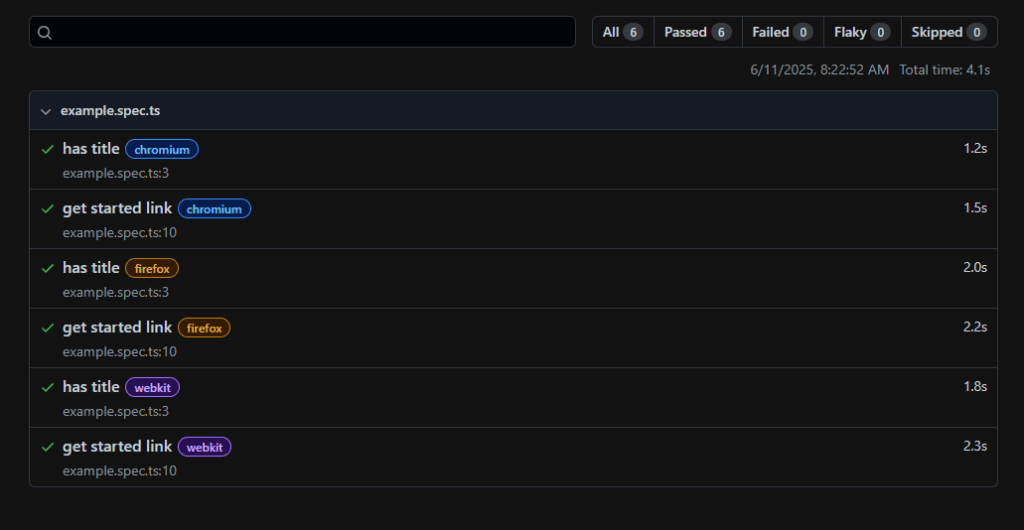
This HTML report provides more details about your test, including various filter options (passed tests, failed tests, flaky tests, and skipped tests). You can click on a particular row for more information on a test run case.
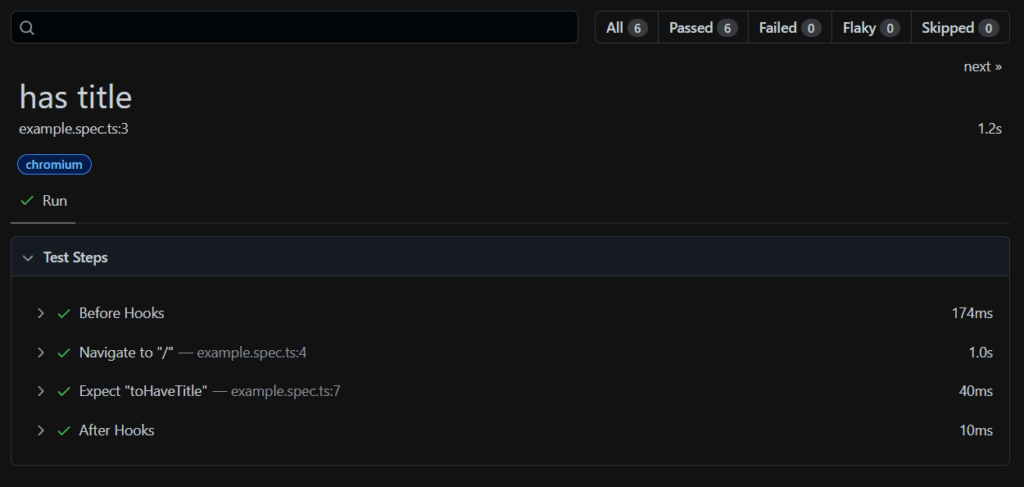
For example, if you select the has title row, you’ll get the following window, showing each step of the test:
To run the same test in a single browser environment, such as Chromium, you can use Playwright’s--project option.
npx playwright test --project chromium
Go ahead and run this command, taking note of the differences. You’ll notice that only two tests were run. Also, the HTML report will only show tests run on Chromium.
That’s it!
Congratulations! You now know how to set up Playwright and run the example test. In the next section, you’ll learn how to write your first test.
Writing Your First Playwright Test
Let’s take a look at the example test script Playwright provided in the tests folder to see how to write a test.
// example.spec.ts

import { test, expect } from '@playwright/test';

test('has title', async ({ page }) => {
	await page.goto('<https://playwright.dev/>');

	// Expect a title "to contain" a substring.
	await expect(page).toHaveTitle(/Playwright/);

});

test('get started link', async ({ page }) => {
	await page.goto('<https://playwright.dev/>');

	// Click the get started link.
	await page.getByRole('link', { name: 'Get started' }).click();

	// Expects page to have a heading with the name of Installation.
	await expect(page.getByRole('heading', { name: 'Installation' })).toBeVisible();

});
If you’re new to TypeScript, JavaScript, or any form of programming, this might seem overwhelming at first glance. But don’t worry about understanding the code for now, it’ll get clearer as we proceed in this section.
The example above shows that Playwright tests consist of three primary steps:
- Navigating to the target URL.
- Interacting with web elements, and
- Adding assertions.
Navigate to the Test Target
Use the page.goto() method to navigate the page to the target URL.
// Navigate the page to the target URL
await page.goto('<https://playwright.dev/>');
In the Playwright-provided example script, the second and third line defines the first test, which is called has title and navigates the page to the URL.
Interact With Web Elements
Interacting with web elements starts with locating the target elements. Playwright provides locator APIs that make it easy to find and locate page elements.
The example script above uses the page.getByRole() locator to locate the Get Started link in the target web app and the click() action to interact with the link.
// Locate and click the get started link
await page.getByRole('link', { name: 'Get started' }).click();
Assertions
Playwright includes assertions to ensure specific conditions, such as a title containing a substring, are met. This is important to verify that the application performs correctly during testing.
To make an assertion, call the expect() function and choose a matcher that addresses the expectation.
The example script above, in the second test, defined asget started link, playwright called the expect() function on the heading with the name, installation, and used the toBeVisible() matcher to verify that the said heading exists.
// Expects page to have a heading with the name of Installation.
await expect(page.getByRole('heading', { name: 'Installation' })).toBeVisible();
By combining these three steps, you can create a quick test script and begin automating your web applications.
For more information and advanced features, check out the official Playwright documentation.
Common Gotchas (and How to Avoid Them)
As powerful and developer friendly as Playwright is, there are still a few common pitfalls that can cause flaky tests or unexpected failures. Here are some things to watch out for:
1. Dynamically Generated Selectors
Many modern frontend frameworks (like React or Vue with CSS modules or styled-components) generate dynamic class names or IDs at build time. These can change between builds and break your selectors.
Tip:
Avoid relying on id or class selectors when they’re auto-generated. Instead, use accessible selectors like getByRole, getByText, or add data-testid attributes specifically for testing.
await page.getByRole('button', { name: 'Submit' }); // More stable
2. Element Load Timing
Web pages are often dynamic and asynchronous, which means elements may not be available right when the test tries to interact with them.
Tip:
While Playwright includes smart auto-waiting, you can use explicit waits when needed:
await page.waitForSelector('#profile-menu');
⚠️ Keep in mind: excessive use of manual waits can slow down test execution. Use them only when necessary.
3. Network Delays & Slow Pages
Tests might fail intermittently if your application makes API calls that are slow or unreliable.
Tip:
Playwright lets you configure test timeouts and retry strategies. You can also mock network calls in test environments to reduce flakiness.
Real-world Test Scenario
If you have a test scenario you’d like to try out, you can replace the one below with yours.
Test Scenario:
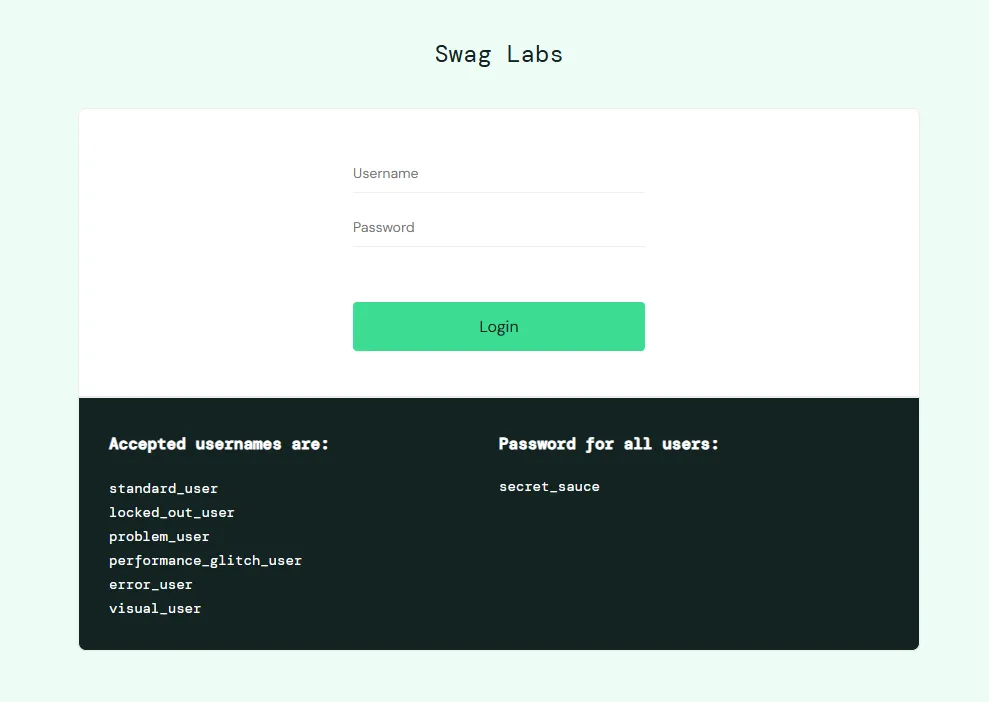
- Navigate to the Sauce Demo E-commerce website.
- Enter the following credentials: username:
standard_user, password:secret_sauce. - Verify that you’re directed to the product page.
The login form is as in the image below:
And here’s the product page:

Step 1: Navigate to the login form
Create a test file (for example: login.spec.ts) in your tests folder, and like in the example test file, import the test and expect objects from the Playwright test module. Then define your test and navigate to the login form.
// .tests/login.spec.ts

import { test, expect } from '@playwright/test';
test('successful login', async ({ page }) => {
	// Navigate to the login form
	await page.goto('<https://www.saucedemo.com/>');

});
Step 2: Interact with the login form
Enter your username and password, then click the Login button. Playwright provides the fill() and click() methods for performing these actions.
To use both methods, you must identify the necessary selectors. Playwright supports different selector types. However, for this example, we’ll use CSS selectors. You can identify them by inspecting the page in a browser.
Here are the selectors for the required page elements:
- Username input field:
#username. - Password input field:
#password. - Login button:
#login-button.
Using these selectors, enter your login credentials and click the Login button.
// .tests/login.spec.ts

test('successful login', async ({ page }) => {
	// ...

	// Enter your username and password
  await page.fill('#user-name', 'standard_user');
  await page.fill('#password', 'secret_sauce');

  // Click the login button
  await page.click('#login-button');
});
Step 3: Include assertions to verify the page state after login
One way to verify a successful login is by checking that a product list is visible, as seen in the product page image above. To do that, call the expect()function on the product list and use the toBeVisible() matcher to reflect the condition.
You’ll need to inspect the page to identify the product list selector. It’s a div with class, inventory_container.
// .tests/login.spec.ts

test('successful login', async ({ page }) => {
	// ...

	// Assert that the inventory container is visible
  await expect(page.locator('#inventory_container')).toBeVisible();
});
Now, put all the steps together to get your complete code.
// .tests/login.spec.ts

import { test, expect } from '@playwright/test';
test('successful login', async ({ page }) => {
	// Navigate to the login form
	await page.goto('<https://www.saucedemo.com/>');

	// Enter your username and password
  await page.fill('#user-name', 'standard_user');
  await page.fill('#password', 'secret_sauce');
  // Click the login button
  await page.click('#login-button');

  // Assert that the inventory container is visible
  await expect(page.locator('.inventory_container')).toBeVisible();
});
Go ahead and run this test to observe your results. You can open the HTML report for more details.
Congratulations! You successfully created and ran a real-world test from scratch.
Conclusion
You’ve learned how to set up Playwright and write and run your first script. Playwright is an easy-to-use automation framework designed to make end-to-end testing as efficient and straightforward as possible.
Now that you know how easy it is to test your web applications using Playwright, go ahead and apply what you’ve learned to your projects.