Automated Testing of Frontend Components

As a developer, I’ve learned that writing code is only half the job. The other half is testing it to make sure everything works as intended. Manual testing takes time and can be overwhelming.
I utilize various testing tools, including Mocha, Jest, Cypress, and Selenium, to automate the testing of my applications. Automation testing saves me tons of hours I could have spent writing test code. It also makes it easy to add new features and updates without introducing errors into the existing code.
In this article, we will explore various terms used in automation testing, examine testing approaches, and perform automation testing of frontend components using Cypress.
Contents
- Introduction
- Terms used in automation testing
- Automation testing approach
- Frontend components testing with Cypress
- Conclusion
Terms used in automation testing
Here are the terms used in automation testing:
Test case: A step-wise sequence with predefined input to execute a test and produce an expected verifiable outcome. We can write a test case for an email validation function as follows:
- Test email validation function
- Input the email in the text box.
- Click the submit button
- Outcome
- Return true for a valid email, and false for an invalid email.
Test Scenarios: This is a detailed description of software features or functionality that is testable. Test scenarios focus on what to test.
Test suite: A set of automated test cases with associated methods for executing the test cases.
Test report and analysis: A test report provides a detailed message about the tests executed, and contains information about test cases that passed or failed, messages and stack traces. The report identifies the source of the error. Suggests ways to fix the error.
Automation testing approach
There are two questions to ask when setting up automation testing:
- What do we test?
- How do we test it?
The answers will help us identify the type of test we want to execute and the appropriate test tools to use:
- Can a website handle one million users simultaneously?
A performance test will tell us. - How do we test?
By using tools that test performance such as Apache JMeter, Gatling, etc. - Can a user login successfully?
This is an end-to-end test, an interaction between the frontend and the backend.
We will use the above approach as a guide, can our frontend components work together? This is UI testing. How can we test it? We will use test tools such as Cypress.
Frontend components testing with Cypress
In this section, we will test the components of a React app with Cypress.
Download the feedback app project from this GitHub repository to follow this article.
Why did we choose Cypress for testing?
Cypress is free and open source, it executes tests in the browser, making it suitable for frontend testing. Cypress is easier to learn when compared to some automation testing tools.
How to add Cypress to an existing project
Follow the instructions in this guide to add Cypress to an existing project. Cypress already exists in the feedback app project. Cypress offers two types of testing: end-to-end and component testing. In this article, we are executing component testing.
The feedback app
Before we begin the automation testing, we will examine the feedback app. Open your terminal and run the commands below.
cd feedback-app
npm install
npm run dev
The code above changes the terminal directory to the root directory of the feedback app, installs project dependencies and starts the development server.
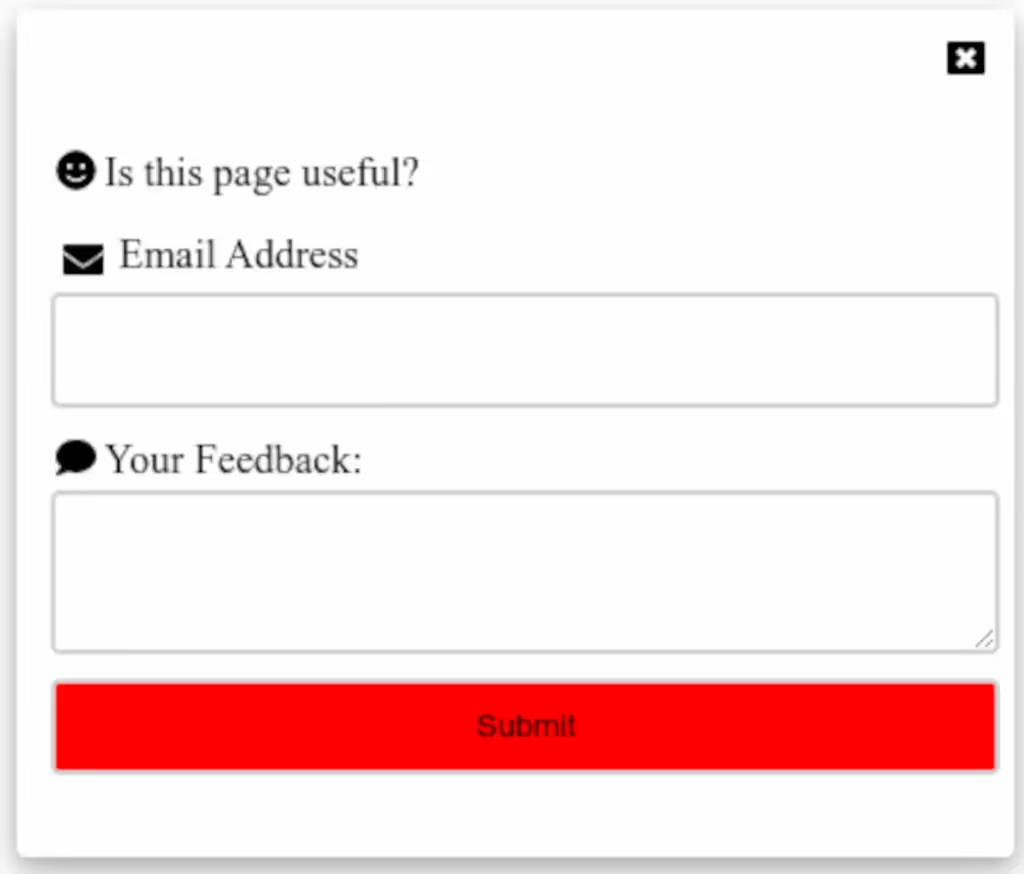
The feedback app displays a red button with “Feedback” written on it.
When a user clicks the feedback button, the app displays a form shown in the picture below.
How to test a component with Cypress
To begin the automation testing, run the command below in the root directory of the feedback project to launch Cypress.
npx cypress openThe above command will launch a Cypress interface like the one shown in the picture below.
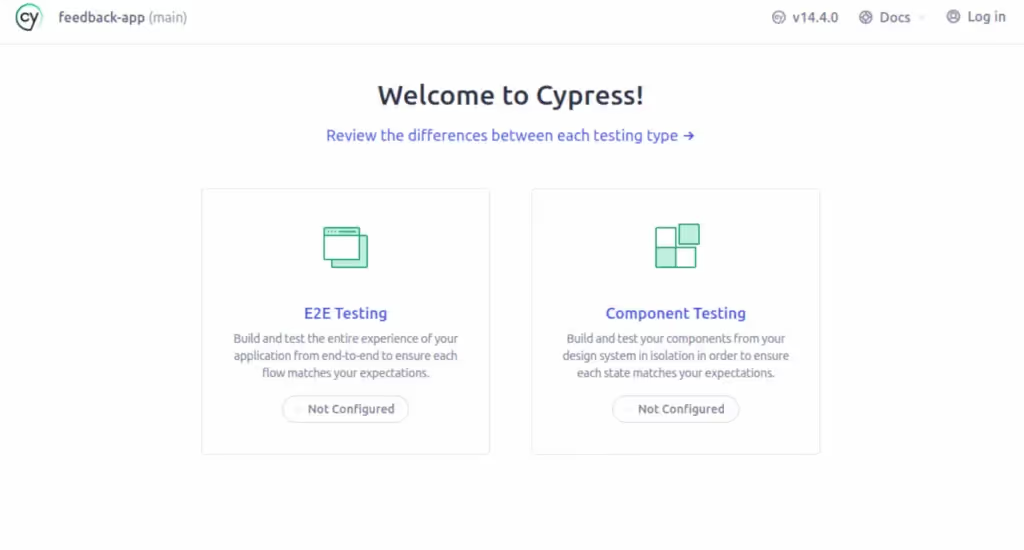
Click on “Component Testing”. The interface will navigate to the next page, shown in the picture below.
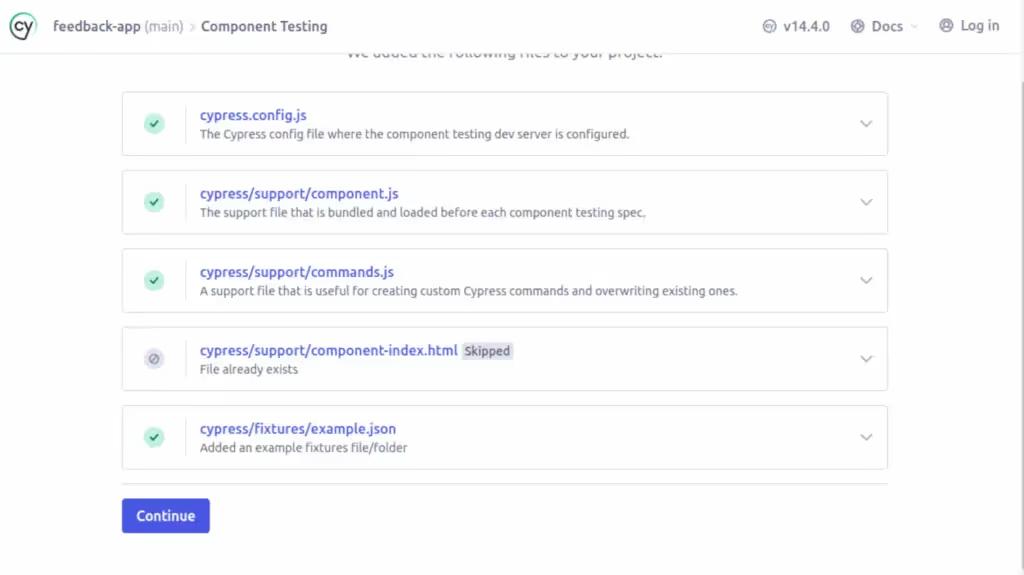
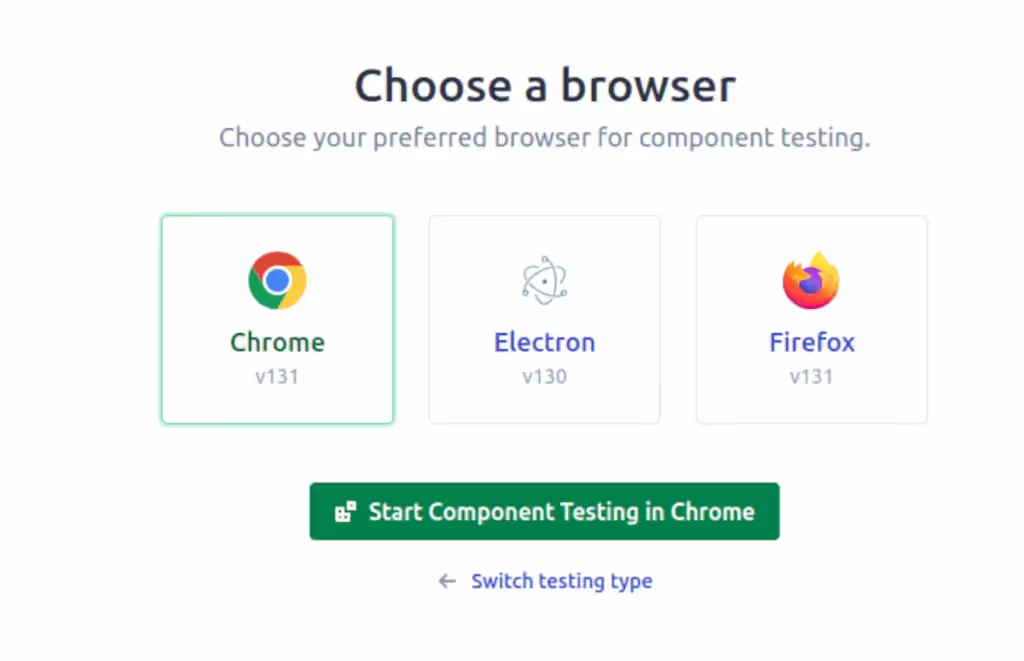
Click on “Continue”. Then, select a browser of your choice and click on “Start Component Testing… ” shown in the picture below.
Cypress executes the test using the spec file.

You can choose “Create from component” or “Create new spec” as shown in the picture above. Choose “Create new spec”.
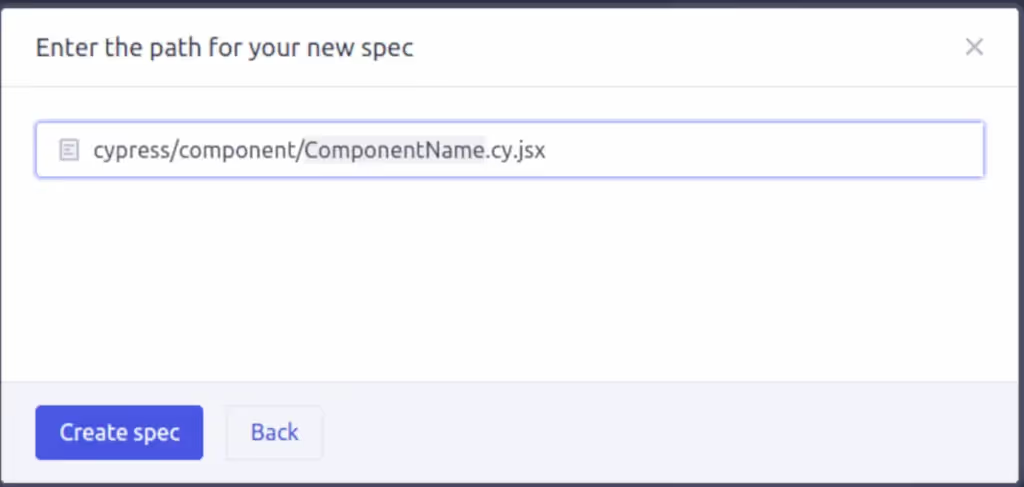
Rename the path as cypress/component/ComponentFeedback.cy.jsx as shown in the picture above. Click on “Create spec” to generate the boiler code shown below.
//ComponentFeedback.cy.jsx
 describe("ComponentFeedback.cy.jsx", () => {
  it("component", () => {
    //cy.mount(<component/>)
  });
});
In the code above, thedescribe() function groups similar tests together and takes two arguments: a string that describes what we want to do and a callback function. Inside the callback function is an it() function. It contains the actual test we want to perform. The it() function takes two parameters: a string that describes what to expect and a callback function that contains the actual test codes. To begin our test, we have to import our app and mount it. Navigate to cypress/ComponentFeedback.cy.jsx, open the spec file and add the codes below.
//ComponentFeedback.cy.jsx
import React from "react";
import App from "../../src/App";
The code above imports the React modules and our feedback app’s root component.
Then, uncomment this line of code //cy.mount(<component/>) as shown below:
cy.mount(< App />)The code above mounts the imported App using Cypress mount function. The spec file should now look like the code shown below:
//ComponentFeedback.cy.jsx
import React from "react";
import App from "../../src/App";

describe("Frontend Component Testing", () => {
  it("App should mount without error ", () => {
   cy.mount(<App />);
 }
     )
}
As you add the code, the test will run by itself. After you have added the code above, the test should run and pass. Below is the result of the test shown in the picture.
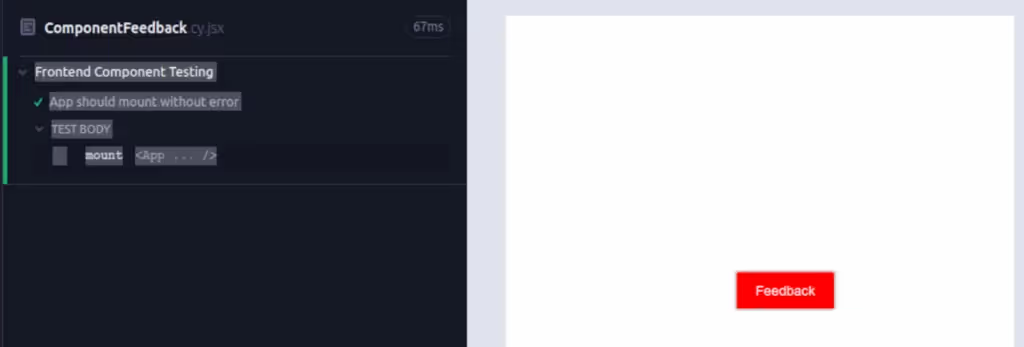
Now, we will test if the button text matches the text “Feedback”. To do this, we select the button and then check if the inner text matches “Feedback”. Add the code below to the spec file.
//ComponentFeedback.cy.jsx
...
cy.get(".feedback-button").then(($btn) => {
      const txt = String($btn.text());
      expect(txt).to.eq("Feedback");
      $btn.click();
    });
Cypress uses the cy.get() command in combination with CSS selector to select component elements. In the code above, we passed the class name of the button element as parameters to the cy.get() command to select the button element.
The then() function allows us to work with objects yielded from the command cy.get('.feedback-button'). The $btn in the code above refers to the object yielded. We retrieved the button text with the $btn.text() command, assigned it to the variable txt and checked if it matches the text ‘Feedback’. We stimulated button click with the command $btn.click(). The test should pass as shown in the picture below.
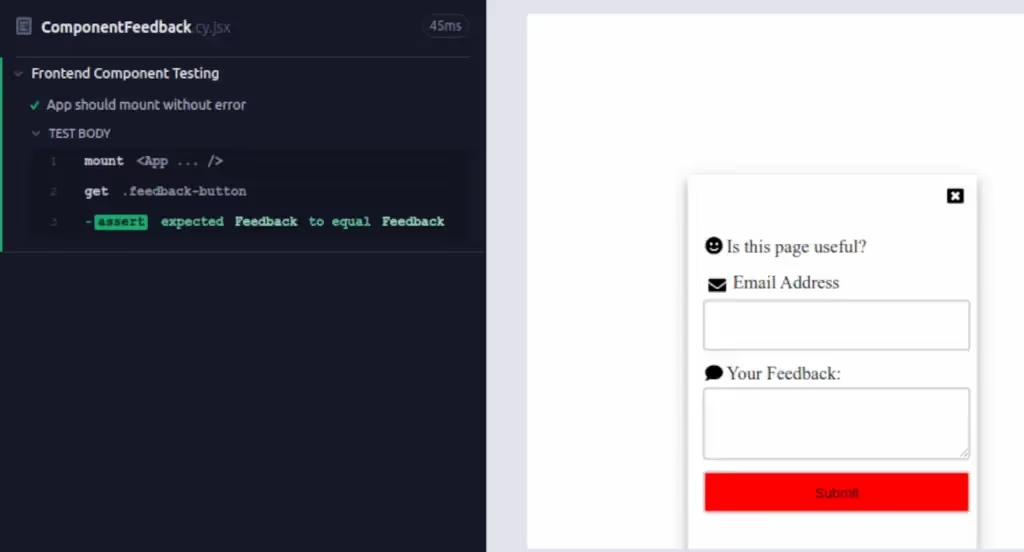
Next, we will test form input and form submission. Add the code below to the spec file.
cy.get(".form-input").type("myname@gmail.com");
cy.get("#msg").type("Interesting docs")
In the code above, we used the Cypress type() command to stimulate user input. The text “myname@gmail.com” should appear in the email input box, and “Interesting docs” should appear in the comment box shown in the picture below.
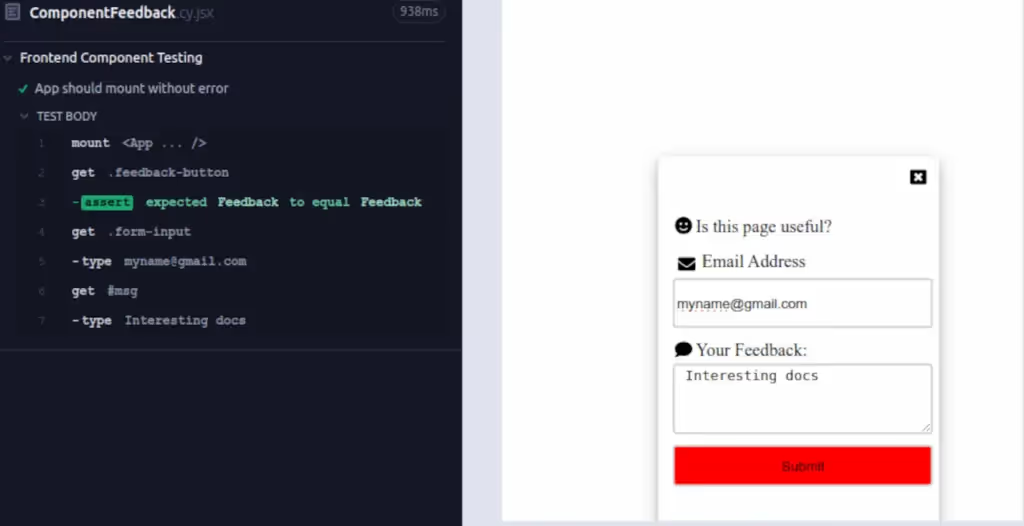
Next, we will test form submission. Add the code below to the spec file.
cy.intercept("", "success");
cy.get('button[type="submit"]').click();
We did not have a Slack implementation, we will use the Cypress cy.intercept(/path, "success")command to stub the POST request that will be triggered when a user submits a form as shown in the code above. Read more about the intercept() command. We submit the form with the command cy.get('button[type="submit"]').click(). Since we did not specify an API URL in the feedback app, we left the path empty in the cy.intercept() command in the above code. The test passed, as shown in the picture below.
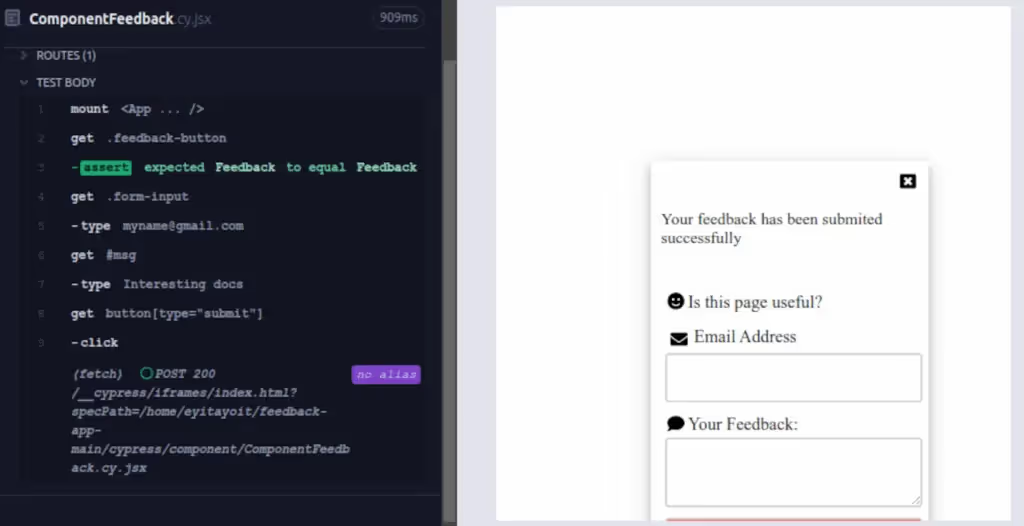
Below is the complete code for the spec file.
//ComponentFeedback.cy.jsx
import React from "react";
import App from "../../src/App";

describe("Frontend Component Testing", () => {
  it("App should mount without error ", () => {
    cy.mount(<App />);
    cy.intercept("", "success");
    cy.get(".feedback-button").then(($btn) => {
      const txt = String($btn.text());
      expect(txt).to.eq("Feedback");
      $btn.click();
    });

    cy.get(".form-input").type("myname@gmail.com");
    cy.get("#msg").type("Interesting docs");
    cy.get('button[type="submit"]').click();
  });
});
Conclusion
In this article, you have learned about the terms used in automation testing, including test cases, test scenarios, reports, and analysis. Now it’s easier to answer questions like “What do we test?” and “How do we test it?”
In case you want to bring your testing to the next level, check out QA.tech and let the AI agents take over the boring parts of testing.

Stay in touch for developer articles, AI news, release notes, and behind-the-scenes stories.

