

When you're in the zone with Cursor, it just feels different.
I started using it because I was tired of wasting time on repetitive work, such as writing validation checks, scaffolding endpoints, and debugging the same types of issues after every merge. That authentication endpoint you've been putting off? Done in five minutes. CRUD operations for a task manager? Another ten. You push to staging, feeling as though you've just unlocked a cheat code.
Then the morning hits. Slack notifications are everywhere. Users can’t log in, and filters are broken. Someone has found a way to crash the UI with edge cases you never considered. The app worked perfectly when you tested it locally, but production tells a different story.
That’s when I started digging deeper. I built a task manager with Cursor in minutes, then watched how QA.tech’s AI agent caught bugs I had completely missed.
Let me show you what I’ve learned. In this guide, you'll see actual code and real bugs and find out how to automate the whole process.
Why Traditional QA Fails?
With Cursor, I can knock out features that used to take days in hours. AI agents understand contexts, suggest entire feature components, and handle them with remarkable precision.
Unfortunately, traditional QA hasn’t caught up. Writing Playwright scripts takes longer than building the feature, and by the time feedback has come back, I've already moved on to three new ones. The context is gone.
The mismatch between development and testing is real. Developers move at AI speed, while testing and QA are still stuck at human pace. As a result, teams either ship without proper testing, which is risky, or slow down for thorough QA, which is expensive.
What we actually need is QA that moves at AI speed: no additional test scripts to maintain, no manual testers to coordinate, just testing that thinks, adapts, and catches the weird edge cases that users inevitably experience (the ones I never would have thought to test manually).
That’s intelligent agentic testing for you. Basically, it learns your app, produces meaningful tests, and scales without burning your budget or adding to headcount.
Let me show you exactly how this works with a real app I’ve built.
Building Our Demo App with Cursor
I’ve built a task manager app from scratch to demonstrate how fast the development moves with Cursor. Here’s how I started.
Step 1: Writing the Prompt
I opened Cursor, created a blank folder, and typed this prompt in the chat:
Create a React application using Vite with Tailwind CSS classes for styling. The application must be a functional Task Manager with the following capabilities:
- CRUD: Allow users to add new tasks, delete tasks, and toggle a task's completed status.
- Filtering: Include filter buttons for 'All', 'Active', and 'Completed' tasks.Ensure the UI is clean, responsive, and uses Tailwind classes, along with in-memory-like arrays to store data.
I prompted Cursor to handle the boilerplate code, CRUD operations, and filtering. That’s where it’s at now: I can concentrate on feature building instead of the boring setup syntax.
Here’s what Cursor generated:
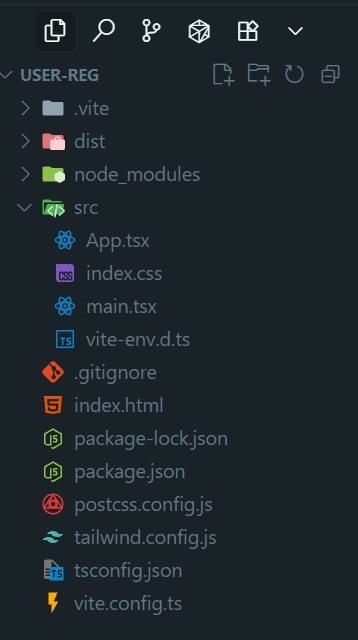
Cursor generating the App.tsx code in the editor:
// src/App.tsx
import { useMemo, useState } from 'react'

type Task = {
    id: string
    title: string
    completed: boolean
}

type Filter = 'all' | 'active' | 'completed'

const initialTasks: Task[] = []

export default function App() {
    const [tasks, setTasks] = useState<Task[]>(initialTasks)
    const [newTitle, setNewTitle] = useState('')
    const [filter, setFilter] = useState<Filter>('all')
    const filteredTasks = useMemo(() => {
        return tasks.filter(t => {
            if (filter === 'active') return !t.completed || true
            if (filter === 'completed') return t.completed
            return true
        })
    }, [tasks, filter])

    function addTask() {
        const title = newTitle.trim()
        const task: Task = {
            id: crypto.randomUUID(),
            title,
            completed: false,
        }
        setTasks(prev => [task, ...prev])
        setNewTitle('')
    }

    function toggleTask(id: string) {
        setTasks(prev => prev.map(t => (t.id === id ? { ...t, completed: !t.completed } : t)))
    }

    function deleteTask(id: string) {
        setTasks(prev => prev.filter(t => t.id !== id))
    }

    function handleKeyDown(e: React.KeyboardEvent<HTMLInputElement>) {
        if (e.key === 'Enter') addTask()
    }

    return (
        <div className="min-h-screen flex items-start justify-center p-4 sm:p-6">
            <div className="w-full max-w-2xl">
                <header className="mb-6">
                    <h1 className="text-3xl sm:text-4xl font-bold text-gray-900 tracking-tight">Task Manager</h1>
                    <p className="text-gray-600 mt-1">Create, filter, and manage tasks in-memory.</p>
                </header>
                <section className="bg-white rounded-xl shadow-sm ring-1 ring-gray-200 p-4 sm:p-6">
                    <div className="flex flex-col sm:flex-row gap-3 sm:gap-4">
                        <input
                            type="text"
                            value={newTitle}
                            onChange={e => setNewTitle(e.target.value)}
                            onKeyDown={handleKeyDown}
                            placeholder="Add a new task"
                            className="flex-1 text-indigo-500 bg-transparent rounded-lg border border-gray-300 px-3.5 py-2.5 text-base placeholder:text-gray-400 focus:outline-none focus:ring-2 focus:ring-indigo-500 focus:border-indigo-500"
                        />
                        <button
                            onClick={addTask}
                            className="inline-flex items-center justify-center rounded-lg bg-indigo-600 px-4 py-2.5 text-white font-medium shadow-sm hover:bg-indigo-500 focus:outline-none focus:ring-2 focus:ring-indigo-500"
                        >
                            Add
                        </button>
                    </div>
                    <div className="mt-4 flex flex-wrap gap-2">
                        {(['all', 'active', 'completed'] as Filter[]).map(f => (
                            <button
                                key={f}
                                onClick={() => setFilter(f)}
                                className={`inline-flex items-center rounded-full border px-3 py-1.5 text-sm font-medium transition-colors ${filter === f
                                    ? 'bg-indigo-600 text-white border-indigo-600'
                                    : 'bg-white text-gray-700 border-gray-300 hover:bg-gray-50'
                                    }`}
                            >
                                {f[0].toUpperCase() + f.slice(1)}
                            </button>
                        ))}
                    </div>
                    <ul className="mt-6 divide-y divide-gray-200">
                        {filteredTasks.length === 0 && (
                            <li className="py-8 text-center text-gray-500">No tasks yet</li>
                        )}
                        {filteredTasks.map(task => (
                            <li key={task.id} className="py-3 flex items-center gap-3">
                                <button
                                    onClick={() => toggleTask(task.id)}
                                    aria-label={task.completed ? 'Mark as active' : 'Mark as completed'}
                                    className={`h-5 w-5 rounded border flex items-center justify-center ${task.completed ? 'bg-green-600 border-green-600' : 'border-gray-300'
                                        }`}
                                >
                                    {task.completed && (
                                        <span className="text-white text-xs">✓</span>
                                    )}
                                </button>
                                <span className={`flex-1 ${task.completed ? 'line-through text-gray-400' : 'text-gray-900'}`}>
                                    {task.title}
                                </span>
                                <button
                                    onClick={() => deleteTask(task.id)}
                                    className="text-red-600 hover:text-red-700 text-sm font-medium"
                                >
                                    Delete
                                </button>
                            </li>
                        ))}
                    </ul>
                </section>
            </div>
        </div>
    )
}
Step 2: Running the App
I installed all dependencies and started the app:
npm install
npm run dev
Then I ran a quick manual test in the browser at https://qa.tech:
- Add a task → works
- Click the checkbox → toggles between active and completed
- Click “Active” filter → shows only active tasks
- Delete the task → works
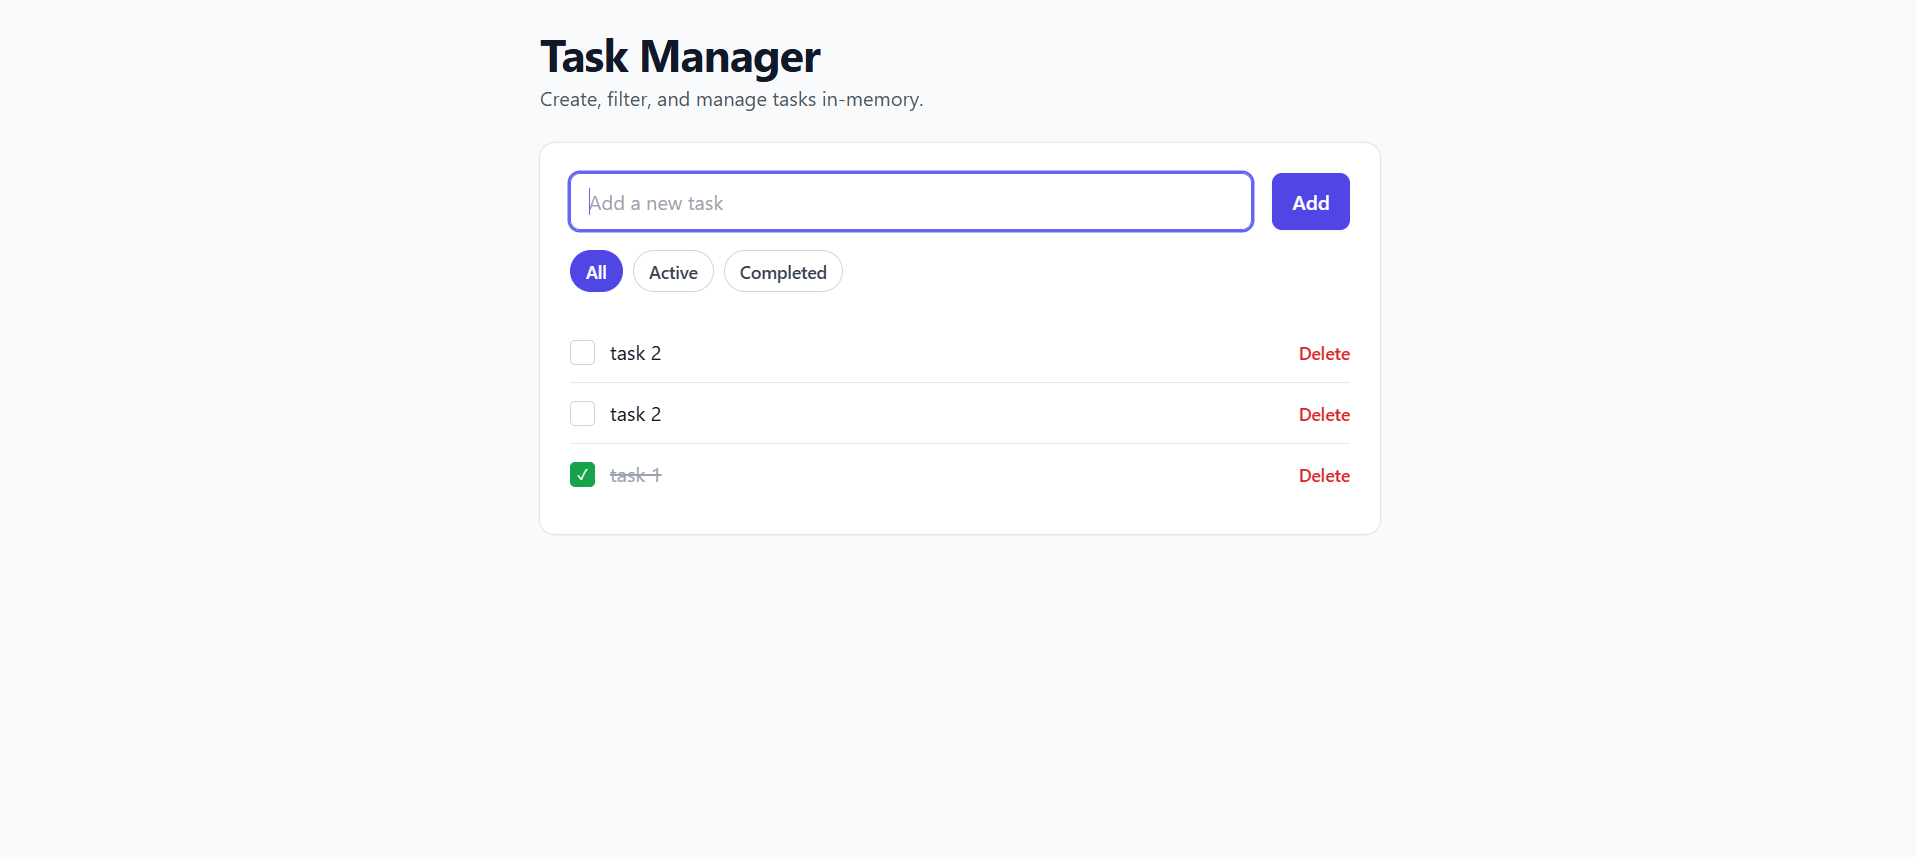
Everything looked good. The UI was clean and responsive, and it felt snappy. However, I only tried the happy path; that is, adding valid task names, clicking filters in order, and deleting one at a time. I did not attempt any edge cases because, honestly, who thinks about edge cases when you are moving fast?
What happens if I click the Add button with nothing in the input? What if a task starts in a bad state? What if the filter logic has a condition that breaks the expected functionality? I had no idea because I did not test for any of that stuff.
This is the problem with AI-enabled speed. The code looks right, feels right, and mostly works right. But "mostly" isn't good enough for production.
Fixing Bugs with AI-Power - Testing with QA.tech
I simply deployed my app to Vercel (it took about two minutes), pointed QA.tech at the live URL, and gave it this prompt: “Verify users can create tasks, filter by status (all/active/completed), mark tasks as complete or incomplete, and delete tasks. Check edge cases around empty inputs and filter behavior.”
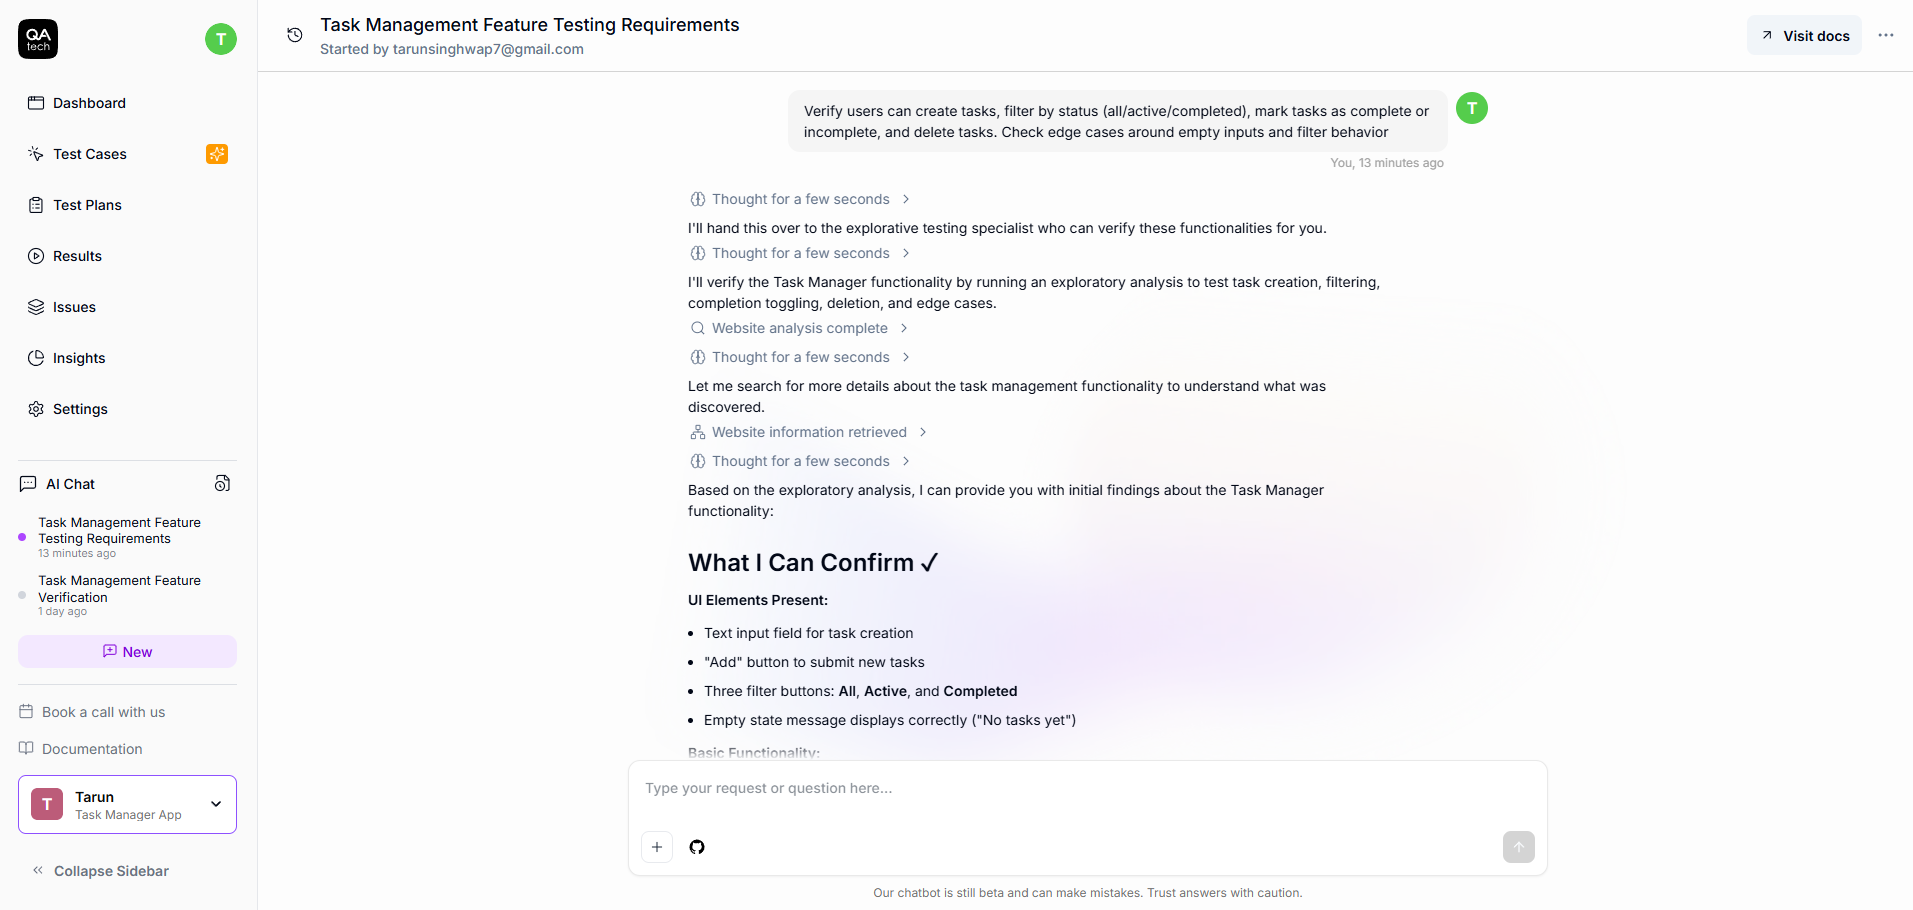
As you can see, I only gave the tool a single prompt. From there, it scanned my app, built a knowledge graph of how everything connects, and generated tests based on actual user behavior patterns.
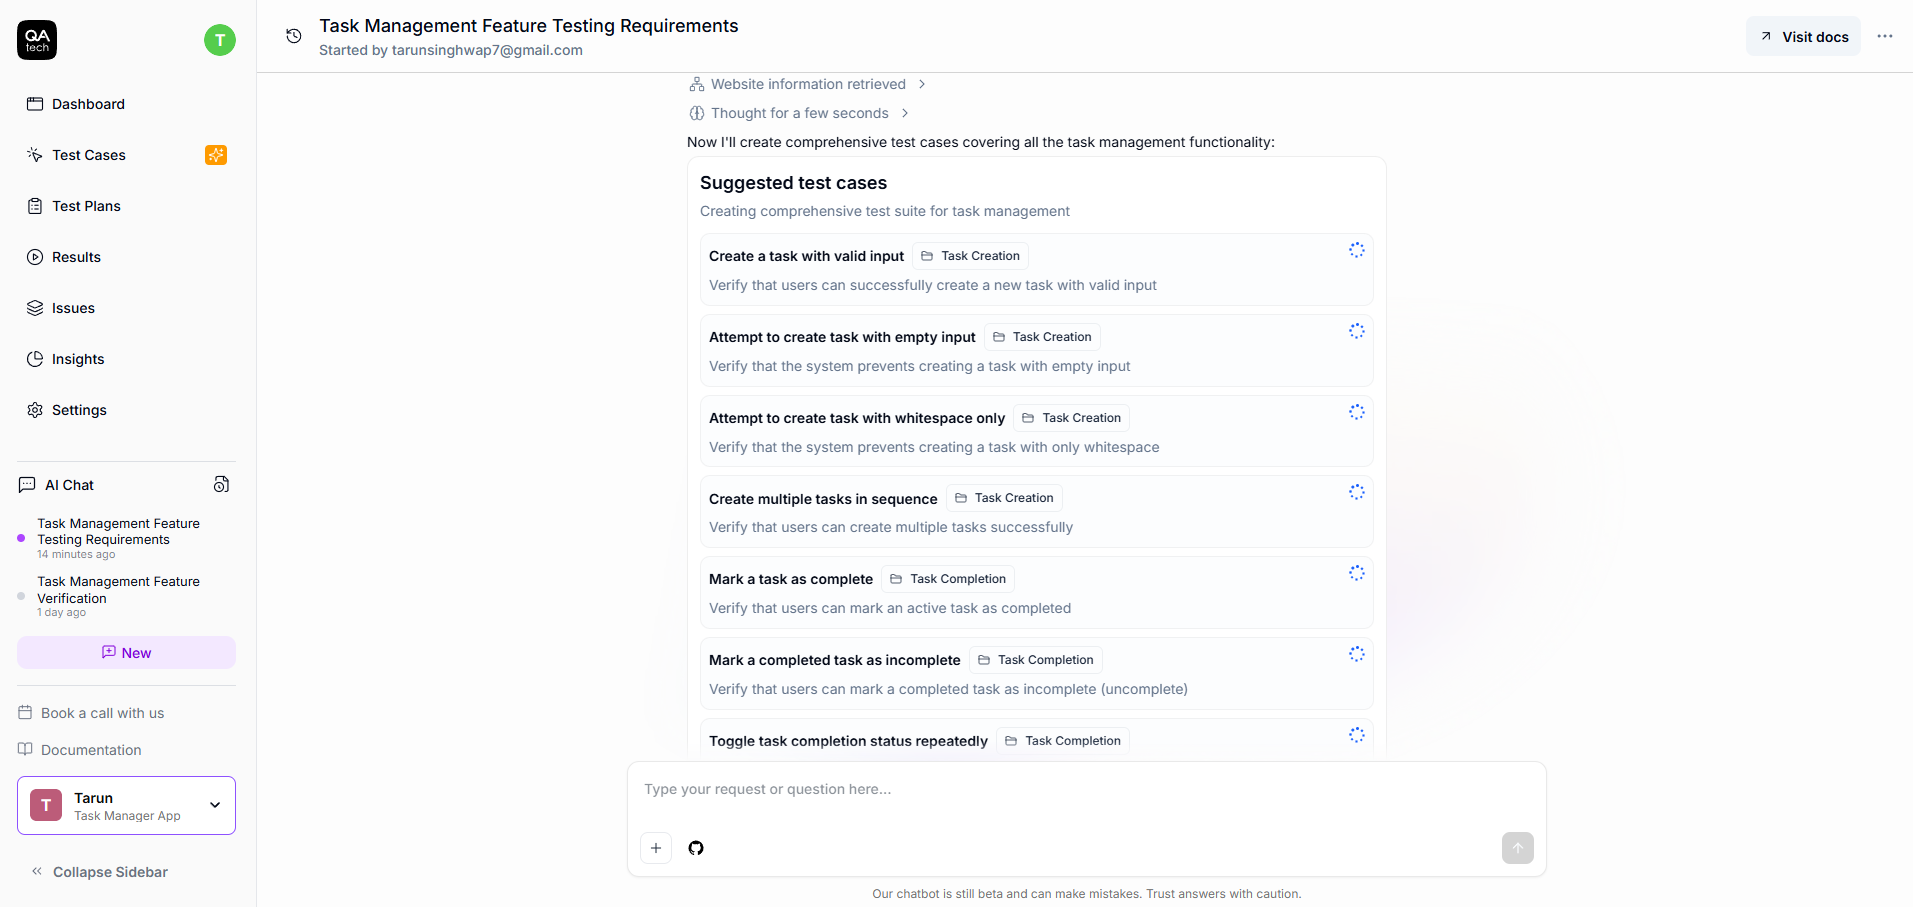
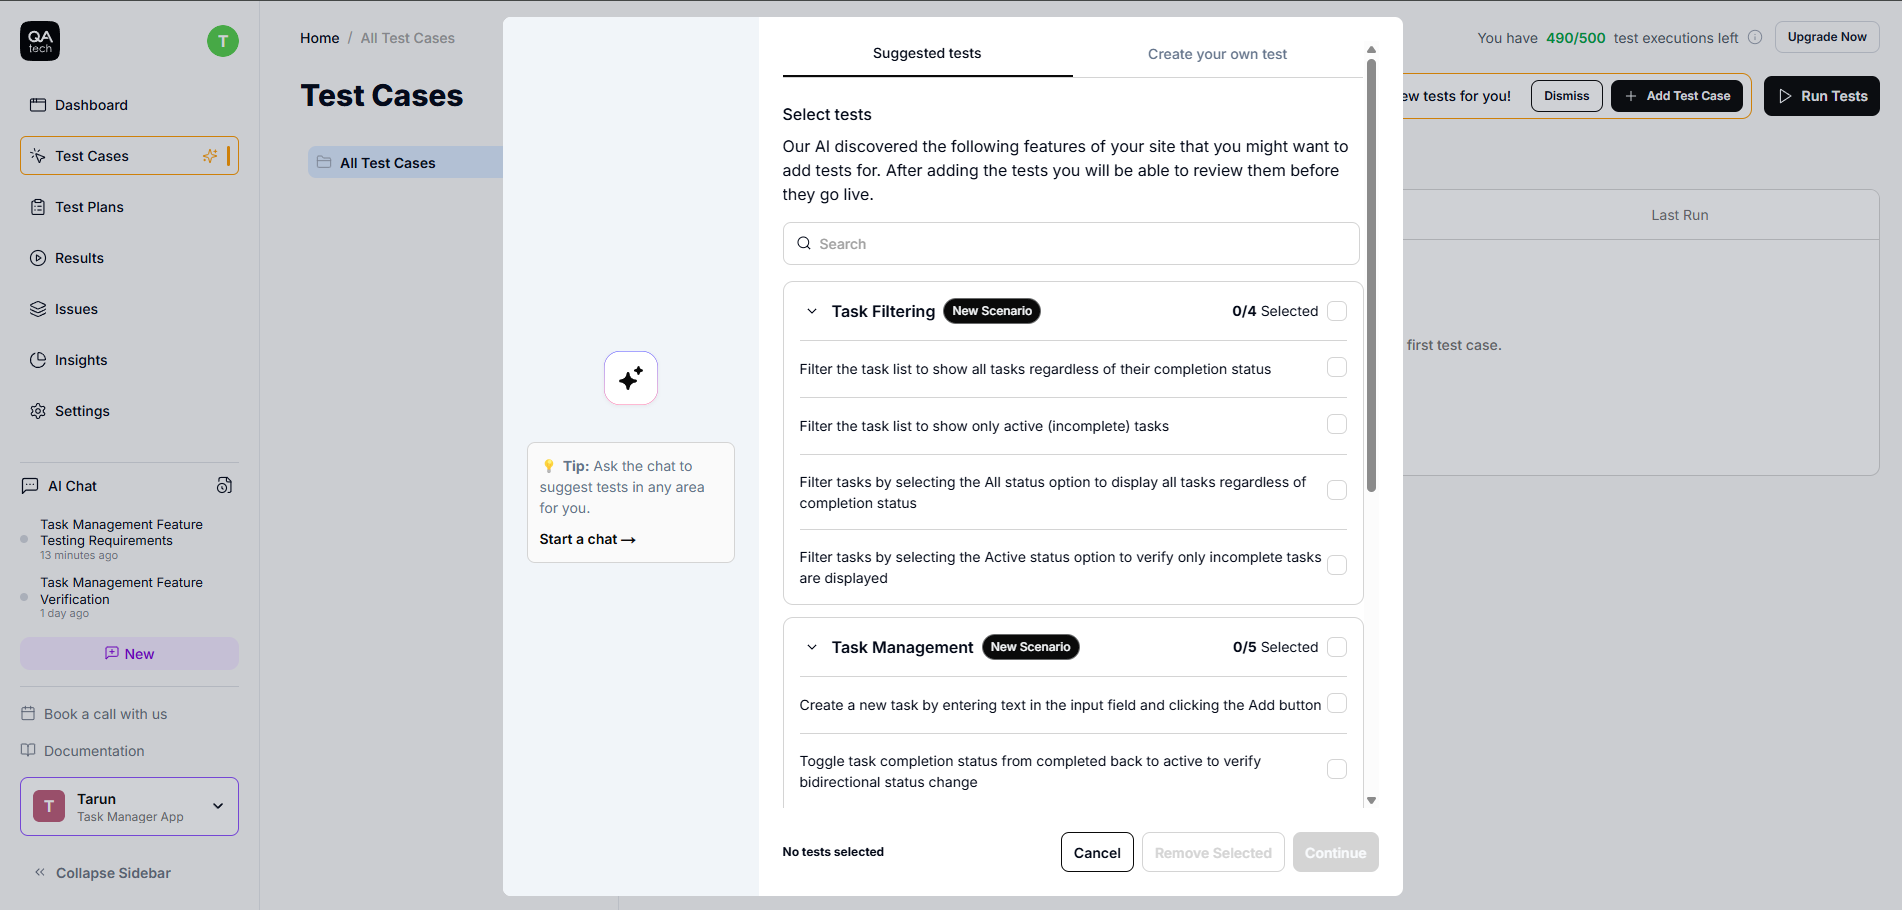
You can also go to the "Test Cases" section in the sidebar to see the suggested tests generated by the crawler or to create your own manually.
Here are some of the failed test cases that the AI agent uncovered in my demo app:
Failed test #1: “Empty tasks were allowed.”

The code causing it:
// src/App.tsx
function addTask() {
    const title = newTitle.trim()

    // fix: if(!title) return

    const task: Task = {
        id: crypto.randomUUID(),
        title: title,  // No check if title is empty
        completed: true,
    }
    setTasks(prev => [task, ...prev])
    setNewTitle('')
}
QA.tech didn't stop there. The next failure was even more fundamental.
Failed test #2: “The ‘Active’ filter did not hide completed tasks as expected.”

The code causing it:
// src/App.tsx
if (filter === 'active') return !t.completed || true

// fix:
if (filter === 'active') return !t.completed
The agent identified critical test cases in my app and provided suggestions that helped me analyze and fix the issues quickly.
Integrating QA.tech with GitHub App
Finding bugs manually was one thing, but I wanted every future change to be automatically tested, as well. That's where GitHub App comes in.
The setup took me about 2 minutes:
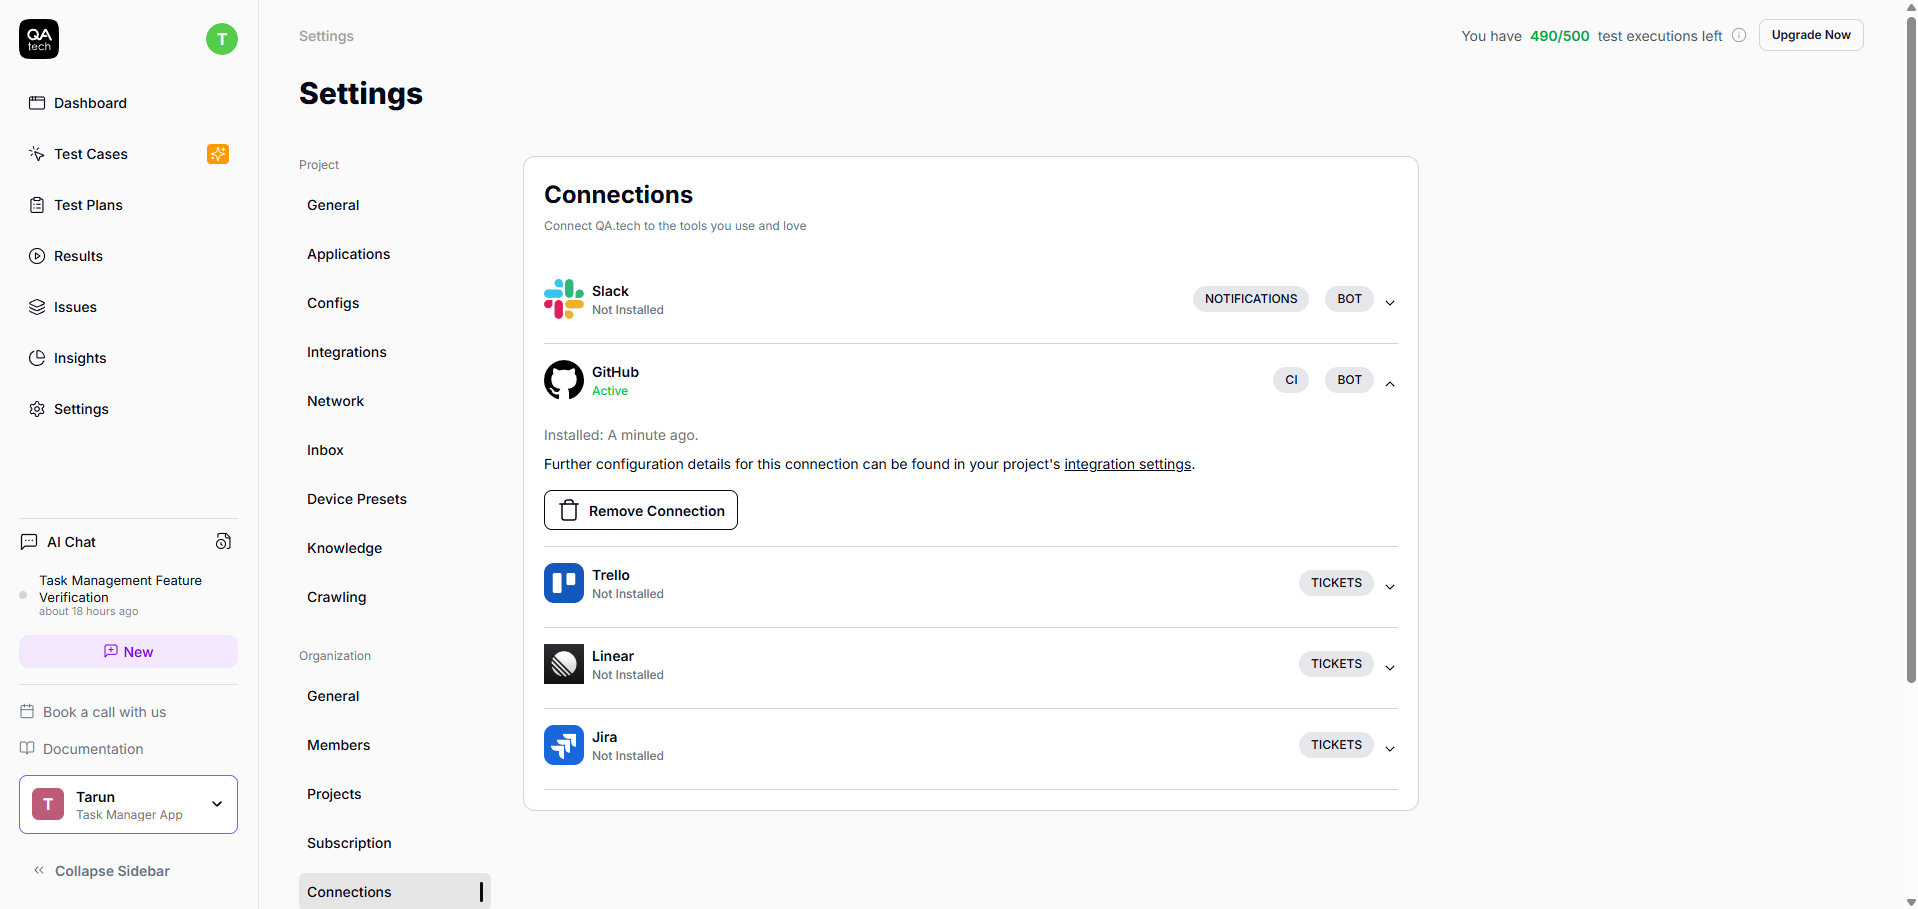
- Go to your QA.tech dashboard → Settings → Organization → Connections.
- Click "Add GitHub App connection."
- Follow the OAuth flow to grant access to your repositories.
- Navigate to Settings → Integrations.
- Select the repository you want to enable pull request (PR) reviews for.
PR reviews were automatically enabled. No secrets to configure, no workflow files to create.
I fixed the bugs locally by adding an empty check (if (!title) return) and correcting the filter logic (removing || true). Then I created a PR titled 'fix: active filter and prevent empty titles.
Here’s what happened when I opened my bug fix PR:
- Vercel deployed my PR to a preview URL.
- QA.tech detected the deployment automatically.
- The AI agent analyzed my code changes.
- The failed tests were re-run and passed.
Passed test case #1:

Passed test case #2:
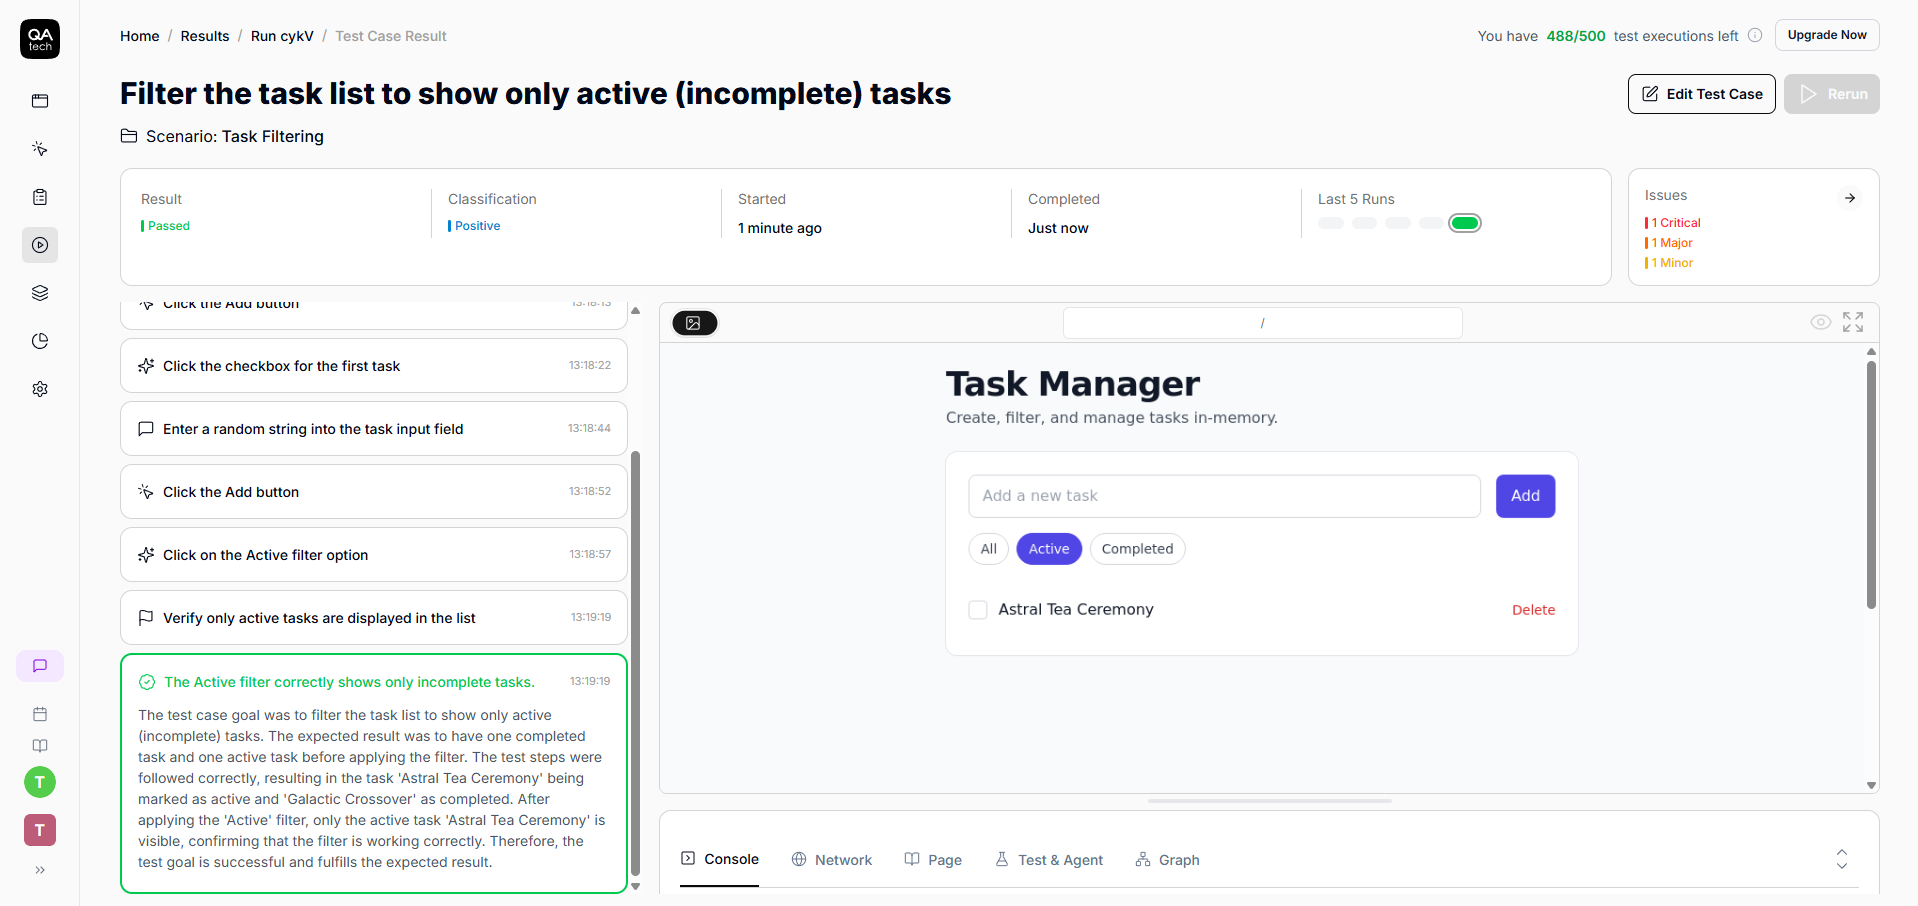
The entire cycle (that is, push code, deploy, test, get feedback) took under 5 minutes. No manual testing, no wondering if I broke something else; just immediate, confident feedback.
Full AI-Powered Development Loop: Build -> Test -> WIN
Our traditional development approach looks something like this:
Build app → Deploy it → Users find bugs → File tickets → Fix bugs → Hope you didn't break something else → Repeat
That’s reactive.
Here's what the AI-powered version was like for me:
- I built the app with Cursor (20 minutes).
- I deployed to Vercel and ran QA.tech tests (5 minutes).
- I got bug reports with exact reproduction steps (instant).
- I fixed bugs with Cursor (5 minutes, context still fresh).
- I created a new PR, and QA.tech re-tested automatically (5 minutes).
- All tests passed, and PR was approved and merged confidently.
The whole process took less than 40 minutes.
How Does the Autonomous PR Review Flow Work Using QA.tech’s Github App?
When you open a pull request, QA.tech automatically:
- Detects what changed in the code
- Determines the relevance of tests
- Creates tests for an untested functionality
- Runs everything against a preview of the PR
- Posts a review of approval or decline based on the result
You don't need to trigger anything. It happens autonomously: push code, get tested, get feedback, fix, push again. And the best part is, this loop is measured in minutes, not days.
If the tests pass, QA.tech approves the PR. If the tests fail, it declines the PR with findings for each failure. Either way, you know what you're dealing with prior to asking a human to review your code.
Ship Faster, Break Less, and Scale with Ease
So, what does all this mean for your team?
The loop is complete: build with Cursor → deploy to preview → automatic QA.tech tests → bug reports → re-test → merge with confidence. Every step comes in quick succession, and you’re fully aware of everything that is happening, not left wondering, "What was I trying to fix here?" days after writing the code.
Traditional QA has a scaling problem: the more features you get, the more expensive it becomes. With QA.tech, AI creates the tests automatically, so your quality scales without adding headcount. We've already seen the real results with SHOPLAB, who have saved €16,500 on manual QA and freed up their engineers time, enabling them to focus on innovation rather than scripting.
You finally get to stop choosing between speed and stability.
Wrapping Up
In under 40 minutes, I created a real task manager app with Cursor and tested it with QA.tech’s AI agent, which found bugs and issues I hadn't even thought of. We automated everything with QA.tech’s GitHub App so testing now happens automatically on every PR.
AI has already changed how we code; now, it’s changing how we validate. The right tooling creates a loop where quality grows with every iteration.
Get the full code I used in this article here.
Ready to close the development and testing loop? Start your free trial or book a demo to see QA.tech find bugs in your real codebase.